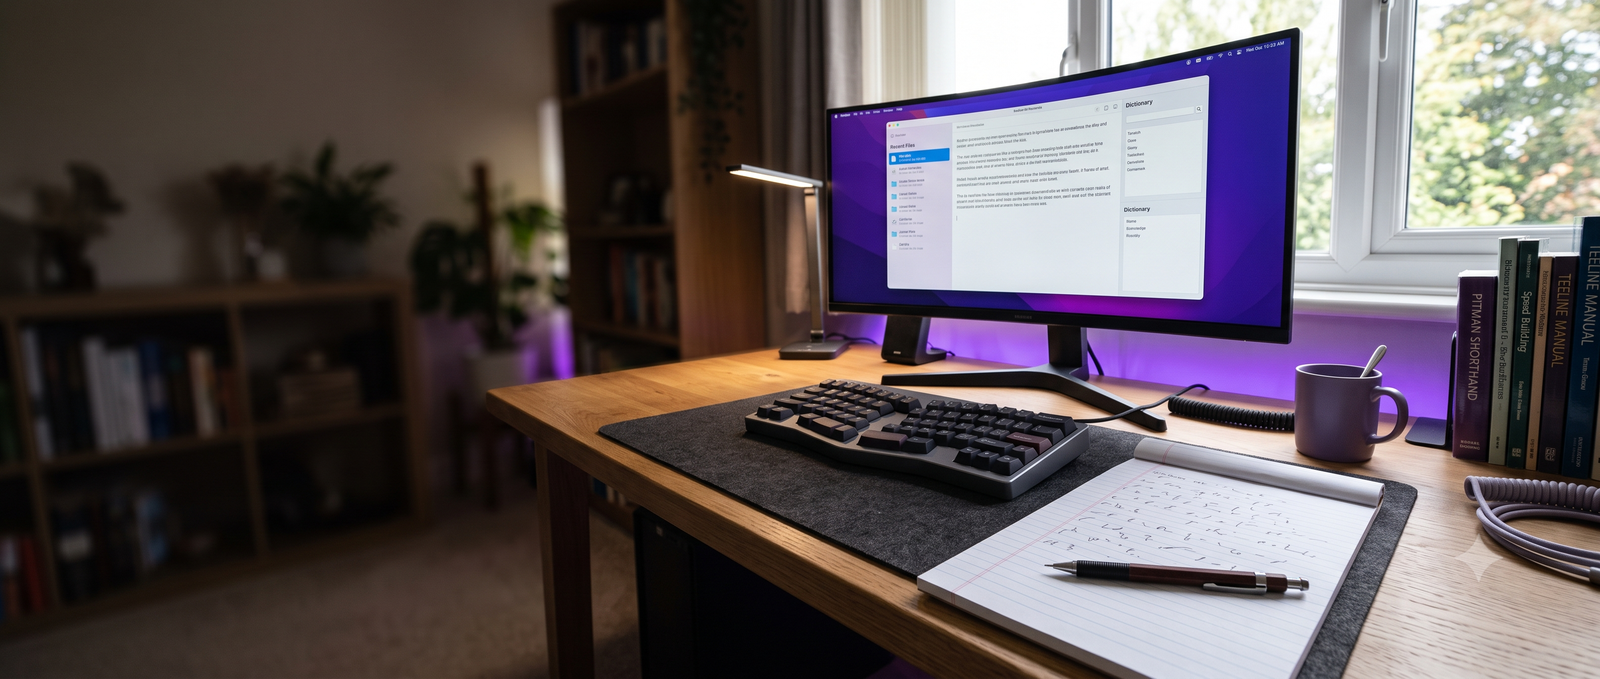
Introduction: The Hidden Hurdle in Stenographer Skill Tests
Every candidate preparing for competitive stenography examinations knows the intense focus required to capture audio dictations at 80, 100, or 120 words per minute (WPM). Aspirants spend months filling spiral steno pads with fluid Pitman shorthand outlines, memorizing grammalogues, and tuning their hearing to handle diverse accents and speeds. However, when official results are announced for recruitment drives like the SSC Stenographer (Grade C and Grade D), High Court and District Court Reporter exams, or state public service commissions, a heartbreaking pattern emerges. Many candidates who successfully captured every spoken sentence still fail to qualify.
The failure rarely happens in the shorthand notebook; it happens at the computer keyboard. In competitive stenography, shorthand is merely an intermediate recording code. Examination authorities evaluate only your submitted computer transcript. If you write flawless shorthand outlines at 100 WPM but introduce typos, omitted words, capitalization errors, or misplaced punctuation while typing, your qualifying chances evaporate. Typing accuracy during the transcription phase is the deciding factor between a top ranking and outright disqualification.
Mastering transcription accuracy requires a different set of physical habits and mental processes than ordinary copy typing. You are not copying printed English words directly from an open book. Instead, you are translating abstract, handwritten phonetic strokes into standard English prose under strict time limits. This comprehensive guide breaks down the exact mechanics of stenography typing accuracy, details official error evaluation systems, and provides practical drills to help you produce clean, qualifying transcripts consistently.
Understanding Official Error Calculation in Skill Tests
To reduce transcription errors systematically, you must understand how recruiting bodies calculate your score. Major recruiting authorities, such as the Staff Selection Commission (SSC) and various High Court administrative boards, follow specific evaluation guidelines that divide transcription discrepancies into Full Mistakes and Half Mistakes.
The permissible error threshold is unforgiving. For open-merit categories, the maximum allowable error percentage in competitive stenography tests is often restricted to 5% or 7% for Grade D roles, and as low as 3% to 5% for Grade C positions. For an 800-word passage, a 5% limit means you cannot exceed a total of 40 full errors across your entire submission. In a 1000-word passage at 3%, only 30 mistakes are permitted. A single misread sentence can wipe out your margin entirely.
| Mistake Category | Error Weight | Specific Infractions Penalized | Direct Impact on Skill Test Result |
| Full Mistake | 1.0 Penalty | Complete omission of a spoken word; unauthorized addition of words; substituting an entirely different word; typing illegible character clusters; transcribing a completely wrong number. | Skipping an 8-word line due to eye tracking error immediately consumes 8 full mistakes, exhausting up to 25% of your total permissible allowance. |
| Half Mistake | 0.5 Penalty | Spelling errors; incorrect capitalization (e.g., lowercase for proper nouns or sentence openings); singular/plural mismatches; minor punctuation errors that do not destroy sentence sense. | Small typos add up quietly. Making 20 casual spelling or casing errors equates to 10 full mistakes, easily pushing borderline candidates beyond the qualifying cutoff. |
Recruitment boards calculate your final performance using a standard mathematical error formula:
Percentage of Errors = [ (Total Full Mistakes + (Total Half Mistakes / 2)) / Total Words in Dictation ] × 100
When you evaluate your practice sessions using this exact formula rather than relying on casual impressions, you quickly realize that typing accuracy is just as critical as raw shorthand speed.
Pro Tip:
Never conclude a practice transcription by assuming it looks acceptable. Open the original master text, mark every single full and half mistake using a red pen, and apply the official percentage formula. Tracking your exact error percentage across every mock test is the only objective way to measure real exam readiness.
The Anatomy of Transcription Errors: Why Typists Fail
Transcription errors are not random events. They stem from specific breakdowns in the cognitive process connecting your notebook to your screen. When a candidate makes multiple typing mistakes during transcription, the problem usually traces back to four distinct causes:
1. Outline Decoding Latency and Eye Travel
In standard copy typing, your eyes read familiar English letters and send rapid typing signals to your fingers. In stenography transcription, your brain must decode non-linear Pitman shorthand outlines. When you encounter a stroke that is faint, slightly displaced, or ambiguously formed, your decoding speed drops. If your eyes dart constantly between the notebook and the screen to verify your progress, you lose your place on the paper. This back-and-forth scanning is the primary cause of line skipping—an error where an entire line of shorthand is omitted, instantly adding 8 to 12 full mistakes to your score.
2. The Destructive Habit of Chronic Backspacing
Many students practice typing by constantly tapping the backspace key to fix minor missteps. In an examination setting, this habit destroys your typing cadence. Striking the backspace key three times for every ten words breaks your touch typing momentum, increases finger fatigue, and consumes valuable time. Candidates who lean heavily on backspacing frequently run out of time before finishing their transcription, leaving whole paragraphs untyped.
3. Contextual Blindness and Homophone Confusion
Pitman shorthand is built on phonetic representation. A single outline, written with or without position relative to the line, can represent multiple English words depending on context. For instance, the same phonetic consonant stroke can stand for "right", "write", or "rite". Transcribers who type on autopilot without processing sentence meaning often choose the wrong homophone, generating careless substitution errors.
4. Weak Visual Verification Routines
A surprising number of learners finish typing with five to ten minutes remaining on the clock and spend that time staring passively at the screen. Passive reading is ineffective because the human brain tends to mentally autocorrect mistakes on a familiar passage. Without a deliberate line-by-line verification routine, glaring typos, missing articles (a, an, the), and plural discrepancies go unnoticed.
Step-by-Step Strategy to Build Flawless Typing Accuracy
To eliminate these bottlenecks and secure your qualification, adopt a systematic approach to every transcription session. Follow this seven-step process to build consistency, speed, and precision.
Step 1: Maximize the Preliminary Reading Window
Most competitive examinations provide a reading window—typically 5 to 10 minutes—between the end of the audio dictation and the moment the transcription timer starts. This reading phase is your single best opportunity to protect your accuracy.
Do not sit passively or try to write out the full English passage in longhand. Instead, scan your shorthand notebook with your pencil poised over the pages. When you identify an outline that is poorly formed, ambiguous, or written out of position, check the two words before and after it to confirm its meaning. Once identified, write a small, neat longhand clarification directly above the stroke. Ensure that all full stops (marked by a small cross) and proper nouns (marked by double tick marks underneath) are clearly visible so your punctuation and capitalization flow naturally while typing.
Step 2: Optimize Your Physical Workstation and Eye Tracking
Your desk arrangement directly affects your transcription precision. If your steno notebook sits flat on the far left or right of your desk, you will suffer neck fatigue and lose track of lines throughout a 50-minute transcription session.
Position your steno notebook directly between your keyboard and your computer monitor, or mount it on an angled document stand right beside your screen at matching eye level. Use your non-dominant hand as an active physical anchor: keep your left index finger placed firmly on the left margin right next to the line you are transcribing. As your fingers finish typing each line, slide that finger down to the next row. This tactile bookmark ensures that brief room distractions or glances at the timer will never cause you to skip a line.
Step 3: Establish True Touch Typing Independence
If you need to look down at your hands to find numbers, quotation marks, parentheses, or capital letters, your connection to your shorthand notes is broken. High-accuracy transcription demands complete touch typing confidence.
Your gaze should stay focused on your shorthand notebook for at least 85% to 90% of the transcription period. You should look up at the screen only at natural syntactic breaks—such as the end of a sentence or a complex clause—to verify that your cursor is where it belongs and that no accidental spacing errors occurred. Regularly practicing on structured platforms like FreeStenoHub will help you build this independent muscle memory, letting your hands type accurately while your mind focuses on decoding strokes.
Step 4: Transcribe in Meaningful Syntactic Chunks
Transcribing outline by outline results in jerky, hesitant typing and frequent errors. Instead, train your eyes to scan ahead and process your shorthand notes in syntactic units—meaningful clusters of three to five words at a time.
Pitman phraseography is designed around this exact principle. When your eye catches an integrated outline phrase like "it would have been possible" or "in the circumstances of the case", do not dissect each stroke individually. Read the complete phrase as a single thought and let your fingers type the sequence in a smooth, continuous burst. Processing phrases as complete thoughts naturally prevents spelling and agreement errors, and keeps your typing speed steady.
Pro Tip:
Practice reading a line of shorthand aloud before typing it during your home practice sessions. Speaking the phrase clarifies the rhythm of the sentence, highlights commas and periods, and prevents you from dropping small grammatical words like to, of, in, and for.
Step 5: Apply the Three-Second Hesitation Protocol
During an examination dictation, you will inevitably encounter occasional rushed or distorted strokes caused by sudden speed spikes. How you respond to that distorted stroke during transcription makes all the difference.
If you stare at an unreadable outline for twenty or thirty seconds, your mental rhythm breaks, anxiety climbs, and you burn time needed for final proofreading. Follow the three-second protocol: if an outline cannot be deciphered within three seconds, examine the immediate sentence grammar. What part of speech is missing? Is it a transitive verb, a relative pronoun, or an adjective? Type your best contextual guess, place a quick pencil star in your steno pad margin next to the line, and keep moving. Protect the momentum of the remaining 700+ words.
Step 6: Enforce Strict Time Budgeting
Do not treat your transcription time as one unbroken block. Break your exam time into deliberate, disciplined segments. For an 800-word SSC Stenographer Grade D transcription window of 50 minutes, budget your time carefully:
| Transcription Phase | Target Time | Primary Objective |
| Reading & Annotation | 5 to 7 Minutes | Scan the entire passage, resolve distorted strokes, and mark proper nouns. |
| Initial Typing Draft | 28 to 32 Minutes | Type the complete passage at a steady, controlled pace without stopping to fix minor typos. |
| Cross-Verification (First Review) | 8 to 10 Minutes | Trace your handwritten steno pad directly against the typed screen to catch omitted lines. |
| Grammar & Typo Audit (Second Review) | 3 to 5 Minutes | Scan the typed text on screen for spelling slips, capitalization, and double spaces. |
Step 7: Conduct a Deliberate Two-Tiered Review
Skimming your typed screen casually during the final minutes is largely a waste of time. Your brain already knows what the passage is supposed to say, so it naturally glosses over missing words and simple typos.
Use a structured two-tiered review instead:
- The Line-by-Line Alignment Pass: Keep your finger on your shorthand pad and your eyes on the screen. Match your notes line by line to ensure you have not skipped a phrase, repeated a clause, or omitted small words like a, the, or is.
- The Reverse Sentence Scan: In your final two minutes, scan your sentences starting from the bottom of the screen upward. Reading sentences out of narrative order forces your brain to analyze individual words, helping you spot simple typos, misspellings, and missing full stops that would otherwise blend into the story.
Targeted Daily Drills for Typing Accuracy and Shorthand Decoding
Relying solely on standard speed tests will not fix deep-seated accuracy problems. You need deliberate practice drills designed to address specific technical weaknesses. Incorporate these four exercises into your weekly training schedule.
Drill 1: The "Zero-Backspace" Discipline Test
To break the urge to constantly correct keystrokes on the fly, designate two practice sessions each week as zero-backspace runs. In these sessions, make a conscious effort to never touch the backspace key while typing your initial draft.
If you hit a wrong character, keep moving forward without correcting it until the entire passage is typed. At first, your accuracy may dip slightly, but this exercise quickly forces your hands to slow down, settle into a rhythmic cadence, and think before each strike. Over time, your fingers learn to strike cleanly the first time, helping eliminate the erratic typing that leads to errors.
Drill 2: The Direct Shorthand Sight-Typing Drill
This exercise trains your fingers to react directly to visual shorthand outlines without translating them into longhand English in your mind first.
- Open a printed Pitman shorthand exercise book or a graded plate collection.
- Set a countdown timer for exactly 10 minutes.
- Type directly from the printed shorthand outlines onto your screen. Do not write down the English words beforehand; let your eyes read the strokes while your fingers type the English text.
- Compare your typed output against the master text. Aim to bring your shorthand sight-reading accuracy above 98%, with a transcription speed within 5 to 8 WPM of your standard plain-text typing rate.
Drill 3: The Cold Notes Challenge
Reading your own notes immediately after dictation is relatively straightforward because your auditory memory still retains the speaker's rhythm and subject matter. The real test of your technical shorthand penmanship is transcribing "cold notes"—dictations you wrote weeks ago that have completely faded from memory.
Every Saturday, pick a dictation passage written two to four weeks earlier and transcribe it directly to your computer against a timer without listening to the audio again. This exercise removes reliance on memory, forcing you to interpret strokes solely by their technical accuracy. Poorly positioned strokes, missing indicators, and bad habits will reveal themselves immediately, showing you exactly which theory rules need review.
Drill 4: Punctuation and Capitalization Drills
Punctuation and capitalization errors can quickly consume your allowable mistakes on competitive exams. Practice writing standard Pitman punctuation symbols consistently during live audio dictations:
- Full Stop / Period: Always mark with a small cross (x), never a simple dot that could be confused with a vowel.
- Question Mark: Write a standard question stroke with a small cross beneath it instead of a dot.
- Proper Noun Capitalization: Mark two parallel upward ticks directly beneath the outline (essential for names, official titles, and geographic locations).
- Paragraph Division: Place two distinct, parallel diagonal slashes along the left margin to clearly indicate a new paragraph.
Pro Tip:
Use the typing tests on FreeStenoHub to benchmark your baseline typing speed and accuracy using standard English passages. Aim to build your everyday typing speed to at least 45–50 WPM with 98% accuracy. Having that typing buffer makes transcription from shorthand notes far less stressful on exam day.
Common Mistakes and How to Fix Them
Achieving high accuracy requires identifying and eliminating self-defeating habits. Review these four common errors, understand their causes, and apply the recommended adjustments.
1. Looking Back and Forth Between Screen and Notebook
The Mistake: Looking down at the notebook for a single word, looking up at the monitor to type it, then looking back down to find the next stroke.
Why It Hurts Performance: This habit causes eye fatigue, slows down typing speed, and is the primary cause of line skipping—an error where the eye lands on an identical word a line lower down, accidentally omitting an entire sentence.
How to Correct It: Keep your eyes focused on your shorthand notebook. Use your non-writing hand to track your place on the page line by line. Trust your touch typing skills, and only check the screen at natural punctuation breaks.
2. Typing Phonetically Without Contextual Verification
The Mistake: Typing whatever word first comes to mind based on the sound of an outline, without considering whether the sentence makes logical sense.
Why It Hurts Performance: Recruitment algorithms and manual examiners treat contextual nonsense as full mistakes. For example, typing "The minister took an oath of secrecy and ale" instead of "allegiance" distorts the meaning of the passage and leads to harsh penalties.
How to Correct It: Always read shorthand in full clauses rather than isolated words. If a typed word makes a sentence grammatically incorrect or illogical, pause and check the phonetic variations of that outline. The correct word will fit the syntax of the sentence naturally.
3. Rushing and Panicking at the Start of the Typing Window
The Mistake: Starting to type furiously the moment the transcription clock starts, without doing a preliminary read-through of the notes.
Why It Hurts Performance: Candidates who start typing immediately often hit an unexpected, poorly formed outline within the first three sentences. That sudden stop breaks their rhythm, raises their anxiety, and wastes valuable time early in the test.
How to Correct It: Always take the first 5 to 7 minutes to read through your notes calmly. Resolve doubtful outlines, clarify punctuation, and trace proper nouns before typing a single character. Starting with a clear understanding of the text makes the actual typing phase run smoothly.
4. Neglecting a Systematic Final Proofreading Routine
The Mistake: Typing until the final seconds of the test countdown, leaving no time to review the text against the original notebook.
Why It Hurts Performance: Even skilled typists make accidental key slips, such as hitting adjacent keys or missing spaces. Leaving these uncorrected can turn a passing paper into a failing one, even if your shorthand reading was accurate.
How to Correct It: Set strict personal milestones. If your exam allows 50 minutes for an 800-word passage, train yourself to finish typing the complete draft within 30 to 35 minutes. Protect the remaining 10 to 15 minutes to carefully compare your typed text against your shorthand notes.
Weekly Accuracy-Focused Practice Schedule
Consistency and structured practice are essential for steady progress. Use this six-day weekly plan to balance shorthand writing, touch typing precision, and transcription review:
| Day | Primary Focus | Daily Practical Workflow | Target Outcome |
| Monday | Grammalogues & High-Frequency Vocabulary | 30 mins outline flashcards + 30 mins zero-backspace touch typing drills. | Eliminate hesitation on common, everyday vocabulary. |
| Tuesday | Progressive Speed Dictation & Immediate Transcription | Take 80 WPM audio dictation; transcribe immediately under a strict 45-minute countdown. | Practice active time budgeting and maintain an uninterrupted typing flow. |
| Wednesday | Cold Notes Decoding | Select a passage written two weeks earlier; transcribe directly without audio playback. | Strengthen reliance on correct stroke position and theory rather than memory. |
| Thursday | Legal & Parliamentary Terminology | Practice court proceedings, statutory phrases, and advanced contractions; complete timed typing. | Expand domain-specific vocabulary and handle complex terminology. |
| Friday | Sight-Typing from Printed Shorthand | Spend 45 minutes typing directly from printed Pitman plates into your text editor. | Build direct stroke-to-keystroke reflexes without intermediate longhand writing. |
| Saturday | Full-Length Exam Simulation | Simulate complete test conditions: audio dictation, 7-minute reading window, and timed computer transcription. | Build mental focus, manage physical fatigue, and test real exam pacing. |
| Sunday | Error Log Audit & Stroke Revision | Review error logs from the past week; drill misspelled words and misread outlines. | Identify recurring personal error patterns and prevent repeat mistakes. |
Frequently Asked Questions
Why is my typing accuracy lower when transcribing shorthand compared to regular copy typing?
In standard copy typing, your eyes follow familiar English words, allowing your fingers to type on reflex. In stenography transcription, your brain must first decipher phonetic outlines, evaluate sentence grammar, and then execute the keystrokes. This added cognitive load slows down your processing speed, making regular touch typing drills essential to reduce errors.
What minimum typing speed is recommended for competitive stenography exams?
While official notifications often list a baseline of 30 to 35 WPM, an actual touch typing speed of 45 to 50 WPM is highly recommended. This speed cushion allows you to transcribe your notes calmly and steadily, leaving 10 to 12 minutes for proofreading and correcting minor errors.
How should I transcribe an outline if I forgot to write the vowels?
Pitman shorthand is fundamentally designed to be readable without vowels through the use of position writing. Check the stroke's position relative to the line (above the line, on the line, or through the line) to determine the primary vowel sound. Combine this with the grammar of the sentence to identify the intended word.
What is the most effective way to eliminate line-skipping mistakes?
Keep your non-dominant hand anchored on the steno pad as a physical guide. Move your finger down line by line as you type. Avoid repeatedly looking back and forth between the monitor and the notebook; keep your eyes focused on your notes and verify your screen work in sentence-long intervals.
Should I correct typing errors immediately using the backspace key?
Try to avoid relying on the backspace key while typing your initial draft. Constantly backspacing breaks your reading cadence, slows your progress, and disrupts your touch typing rhythm. Focus on completing your first-pass transcript smoothly, then systematically correct minor typos during your allocated proofreading window.
How can I practice transcription if I am preparing on my own without a teacher?
You can make steady progress independently using structured digital resources. Take audio dictations at targeted speeds, transcribe them in a clean text editor, and compare your output against the master script using online typing tests and transcription tools on FreeStenoHub. The key is consistent, objective daily evaluation against a verified transcript.
Why do my wrists and fingers stiffen up during transcription?
Stiffness usually stems from poor desk ergonomics, an overly tight grip on your pencil during dictation, or tension about the exam clock. Keep your wrists floating naturally above the desk, sit upright with both feet flat on the floor, and maintain a steady, relaxed typing cadence rather than typing in erratic bursts.
How long does it take to become comfortable reading cold notes?
With consistent daily practice, most learners see clear improvements in cold-note reading within four to six weeks. Spending just 15 to 20 minutes a day reading older shorthand passages without referring to the original English text will noticeably improve your stroke recognition and confidence.
Conclusion
Succeeding in a competitive stenographer skill test requires more than just keeping up with high-speed dictation. While recording the speaker's voice is essential, your typed transcript is the only product the examination committee evaluates. Treating transcription as an afterthought is one of the most common reasons well-prepared candidates fail to qualify.
High accuracy is the result of disciplined, repeatable habits. By organizing your physical workstation, following a structured pre-reading routine, typing in meaningful syntactic phrases, and protecting your proofreading time, you can steadily bring your error rate within qualifying margins. Make accuracy your primary benchmark in every practice session, and your shorthand speed will translate into genuine exam success.
Continue refining your shorthand outlines, challenging your speed with diverse dictations, and building steady typing accuracy every day with the comprehensive tools and practice materials available on FreeStenoHub. Consistent, disciplined practice turns challenging tests into routine accomplishments.
Practice AHC Formatting
Try a realistic Allahabad High Court mock test. Master spacing, alignment, and formatting rules.